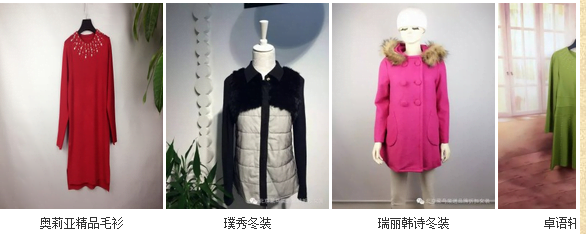
对于一些公司企业网站,在网站的首页可以通过滚动展示的效果去展示公司的产品,这样可以有效的节省网页的空间,并且能更多的展示产品的图片。
对于使用wordpress程序去做企业官方网站时,如果去实现这种滚动展示产品图片的效果呢?

产品滚动展示功能制作步骤
第一步:在网站中需要显示产品滚动效果的DIV里插入以下的HTML代码,用于调用网站后台某个版块的文章内容;
<!–产品滚动–>
<div class=”chanpinzhanshi” id=”chanpinzhanshi”>
<div id=”indemo”>
<div id=”demo1″>
<ul>
<?php if (have_posts()) : ?>
<?php query_posts(‘cat=2’ . $mcatID. ‘&caller_get_posts=1&showposts=10’); ?>
<?php while (have_posts()) : the_post(); ?>
<li><a href=”<?php the_permalink() ?>”><img src=”<?php echo get_first_image(); ?>” alt=”<?php the_title();?>展示图”><?php echo mb_strimwidth(get_the_title(), 0, 24, ”); ?></a></li>
<?php endwhile;?>
<?php endif; wp_reset_query(); ?></ul>
</div>
<div id=”demo2″></div>
</div>
</div>
<!–产品滚动–>
第二步:以上的代码中有一个参数 cat=2 ,这里面的2为网站后台的分类的ID号,可以更换成自己需要调用的分类目录的ID号;
第三步:为达到产品滚动展示,我们还需要加一段控制产品滚动的JS特效代码。把以下的JS代码放到第一步HTML代码的下方。
<script>
<!–
var speed=30;
var tab=document.getElementById(“chanpinzhanshi”);
var tab1=document.getElementById(“demo1”);
var tab2=document.getElementById(“demo2”);
tab2.innerHTML=tab1.innerHTML;
function Marquee(){
if(tab2.offsetWidth-tab.scrollLeft<=0)
tab.scrollLeft-=tab1.offsetWidth
else{
tab.scrollLeft++;
}
}
var MyMar=setInterval(Marquee,speed);
tab.onmouseover=function() {clearInterval(MyMar)};
tab.onmouseout=function() {MyMar=setInterval(Marquee,speed)};
–>
</script>
第四步:以上的JS控制代码中的参数 var speed=30;可以控制图片滚动的速度,数值越大,滚动速度越快,可以改成自己需要的滚动速度。
第五步:最后一步就是要滚动区域添加一些CSS样式,来控制这个区域的显示效果。在自己的网站模板的style.css文件中特别下方添加以下的CSS样式代码。
(height:246px; width:762px; 是控制滚动区域的高度与宽度,可以改成符合自己网站的尺寸)
.chanpinzhanshi{ height:246px; width:762px; float:left; overflow:hidden;}
.chanpinzhanshi li{ width:163px; height:206px; text-align:center;float:left; margin-right:3px;}
.chanpinzhanshi img{ width:163px; height:206px; margin-bottom:5px;}#indemo {float: left;width: 8000px;margin-top:3px;}
#demo1 {float: left;}
#demo2 {float: left;}
.chanpinzhanshi li{ width:163px; height:206px; text-align:center;float:left; margin-right:3px;}
.chanpinzhanshi img{ width:163px; height:206px; margin-bottom:5px;}#indemo {float: left;width: 8000px;margin-top:3px;}
#demo1 {float: left;}
#demo2 {float: left;}


